
Users and access
Access in Fisetra has two independent layers, and understanding that they are separate solves most access problems before they start.
| Layer | Question it answers | Where it is set |
|---|---|---|
| Role | What can this person do? | Access Rights |
| Assignment | Which assets can this person see? | Per user, on User List |
A generous role with no assignments produces a user who can do a great deal to nothing at all. That combination is the single most common access complaint, and it is a configuration issue rather than a fault.
Roles are yours to define
Fisetra has no built-in roles. Your company creates its own, and each role is a set of individual capability switches — view assets, create movement documents, edit the company profile, and so on.
Two companies on Fisetra can both have a role called "Manager" that means entirely different things. There is no shared meaning; there is only what you switched on.
Capabilities are fine-grained. Separate switches control viewing, creating, voiding and configuring, and asset detail tabs have their own view capabilities, so a role can be allowed to see an asset's general details but not its purchase values.
Anything not granted is hidden, not merely disabled. A missing menu entry is a permission, not a missing feature — which is worth telling your users, because otherwise they report it as a bug.
Create a role
Requires the capability to access user roles. Configuration → User Management → Access Rights.
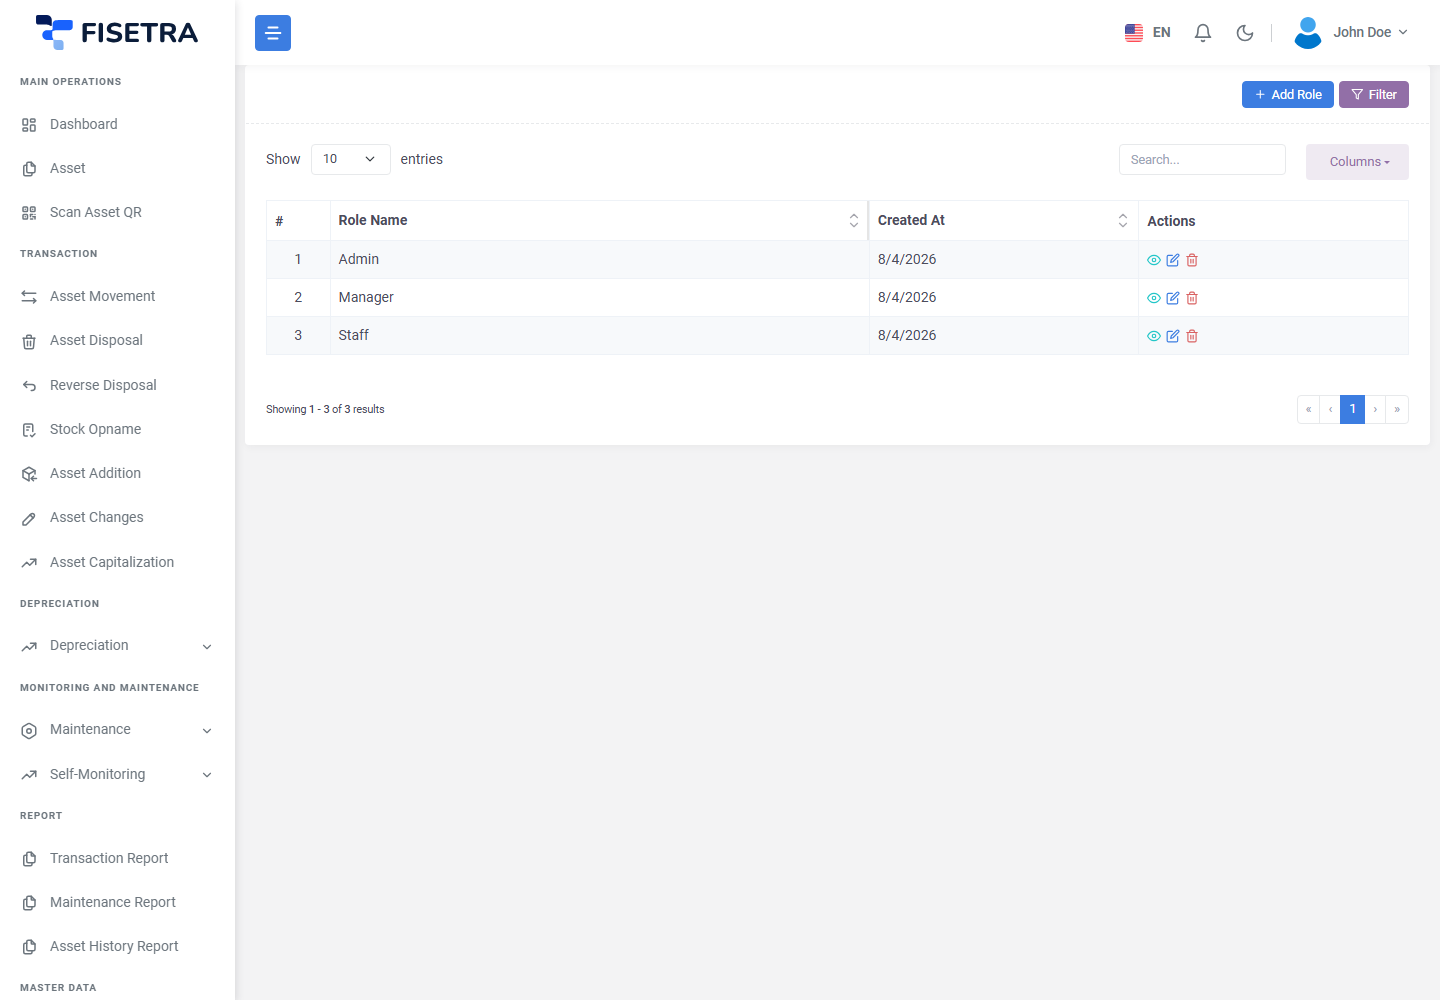
- Open Configuration → User Management → Access Rights.
- Select the create option and give the role a name that describes the job — "Warehouse Officer", not "Role 2".
- Switch on the capabilities the role needs.
- Save.
Grant what the job needs and nothing more. It is easy to add a capability when someone asks and awkward to take one away afterwards.
Suggested starting points:
| Job | Typically needs |
|---|---|
| Asset recorder | View assets and master data; create additions, changes and movements |
| Approver | View the relevant document types; nothing that creates them |
| Read-only / audit | View capabilities only, including reports |
| Administrator | Master data, configuration, user management and access rights |
Editing a role takes effect for everyone holding it, immediately.
Invite people
Configuration → User Management → User List.
- Open the invitation option and enter the person's email address.
- Choose the role they will hold.
- Send.
They receive an email; accepting it creates their account, or attaches an existing account to your company. Pending invitations can be resent or cancelled from the same screen.
Invitations are tied to the address they were sent to, and they expire. See Getting started for the recipient's view.
Set what a user can see
This is the second layer, and the one people forget.
For each user, assign the locations, departments and categories whose assets they may see. On the user's record:
- Assign Location
- Assign Department
- Assign Category
Each of the three also has an "see all" option, granting the whole axis rather than a list.
How the three combine
The three axes are combined with and. An asset must satisfy all three for the user to see it.
WARNING
On an axis where "see all" is off and no assignment has been made, the user sees nothing on that axis — and because the axes combine with and, they see no assets at all.
This is the default for a new user. A newly invited person will find an empty asset list and an empty dashboard until you assign them, and nothing about the interface explains why. Make assignment part of your onboarding routine.
Assignments flow through everything: the asset list, the dashboard, reports, exports and the assets selectable on documents. Two people running the same report can get different results and both be right.
Choosing how to scope
Scope by the axis that matches responsibility. A site manager is scoped by location, a department head by department, a fleet manager by category. Scoping on all three at once is rarely necessary and makes the result hard to reason about — if someone cannot see what they expect, an over-narrow third axis is usually why.
This is also where your master data tree design pays off: assignment is only as precise as your locations and categories allow.
Change someone's role or access
From User List, open the user to change their role, adjust their assignments, or block them.
Changes apply immediately. Someone whose capability is removed while signed in loses access to it at once.
Remove access
Blocking a user keeps their history — documents they raised and approvals they gave stay intact and attributed — while stopping them signing in to this company. That is almost always what you want when someone leaves: the record of what they did must survive.
Blocking is per company. A user blocked in one company keeps access to any others.
Your own profile
Any user can open Profile from the user menu to change their name, avatar and password. Name and avatar are shared across every company; role and assignments are not.
Common problems
| Problem | Why | What to do |
|---|---|---|
| A new user sees an empty asset list and dashboard | No location, department or category assigned | Assign them, or switch on "see all" for the relevant axis |
| A user sees some assets but not others | The three axes combine with and | Check all three, not just the obvious one |
| A menu entry is missing | The role does not include that capability | Grant it in Access Rights |
| An asset tab is missing | Tabs have their own view capabilities | Grant the specific tab capability |
| An invitation was never received | Wrong address, expired, or in spam | Resend it from User List |
| An invitation cannot be accepted | It was sent to a different address | Cancel it and reinvite the correct one |
| A user still has access after leaving | They were not blocked | Block them from User List |
| Two people get different report totals | Different assignments | Expected — compare their assignments |