
Asset labels
Use Configuration → Asset Label Configuration to prepare reusable label presets. Your role needs the Can access asset label designer capability. Exporting labels from the asset list requires asset-view access and a saved preset.
Prepare registered assets before previewing or exporting. See Managing assets.
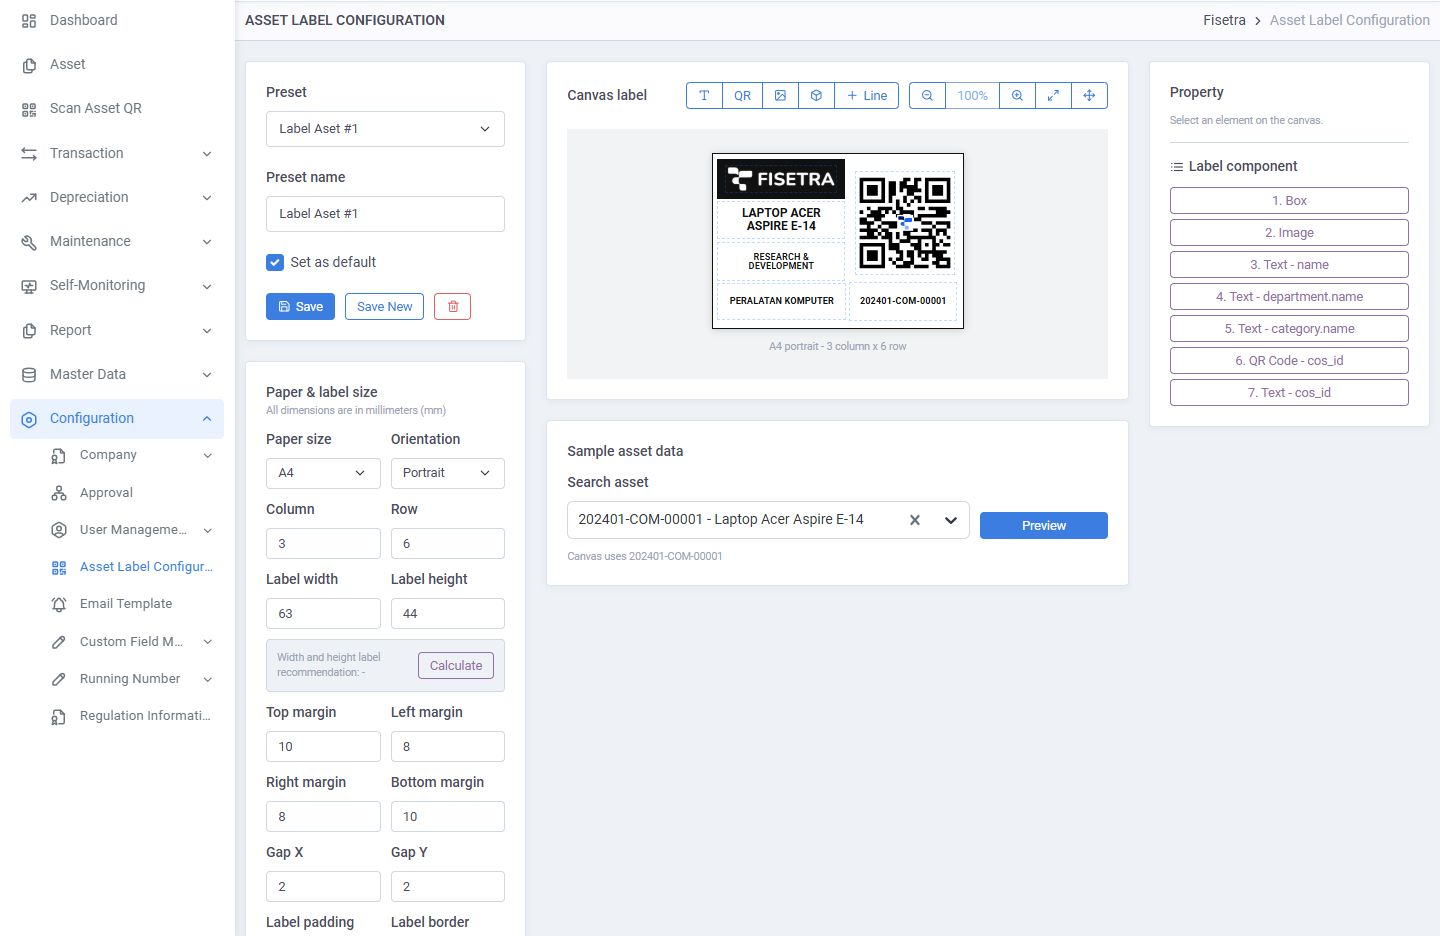
Create a preset
- Open Configuration → Asset Label Configuration.
- Choose New preset and fill Preset name.
- Under Paper & label size, choose the paper size and orientation.
- Set columns, rows, label width/height, margins and gaps in millimeters.
- Use Calculate to see a recommended label size. Check any grid-size warning.
- Add and arrange label components.
- Choose Save, or Save New to keep a separate copy. Optionally select Set as default.
Use Custom paper size when the sheet needs its own width and height. Padding and borders reduce the usable content area inside each label.
Arrange components
| Control | Purpose |
|---|---|
| Add text | Show a fixed text or an asset field |
| Add QR | Add a QR code generated from the Asset Number |
| Add image | Add an image |
| Add box / Add line | Add a border or separator |
| Property | Set the selected component's dimensions, field, typography and colors |
| Label component | Select components already on the canvas |
Drag a component to position it and use its resize control or dimensions for sizing. Zoom and pan help edit the canvas; they do not change the label's physical size.
The QR value comes from the Asset Number, even when another field is used for visible text. Do not assume it uses the barcode or serial number printed next to it.
Preview with an asset
- Under Sample asset data, search by asset number or name.
- Select the asset and choose Preview.
- Check the number, name, QR code, long text and component boundaries.
- Save the preset after the layout is correct.
A canvas with sample placeholders is not proof that every asset's longer text will fit.
Export selected labels
- Open Asset and select the assets to label.
- Choose Export Label.
- Check the selected asset count and choose a Label preset.
- Choose Export to download the PDF.
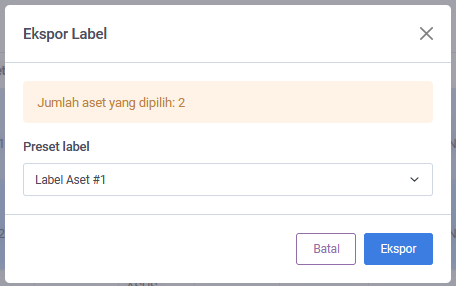
Selection is cleared when the asset-list page, page size or filters change. Check the selected count immediately before export. The asset-list export starts at the first label position.
Print a sample at the intended paper size and actual scale before using label stock. Check alignment and scan the printed QR code.
Common problems
| Problem | What to do |
|---|---|
| The designer menu is missing | Ask for the label-designer capability |
| Export cannot proceed without a preset | Ask someone with designer access to save a preset first |
| Grid exceeds the paper | Reduce label size, margins/gaps, rows or columns, then recalculate |
| Text is clipped | Preview a representative asset and adjust the field, size or component |
| Export includes fewer assets than expected | Recheck selection after pagination or filtering |
| Printed labels are misaligned | Check paper size and printer scaling, then print another sample |